Chocolate Thumbprint Cookies
There are few cookies as delightful, charming, and downright irresistible as
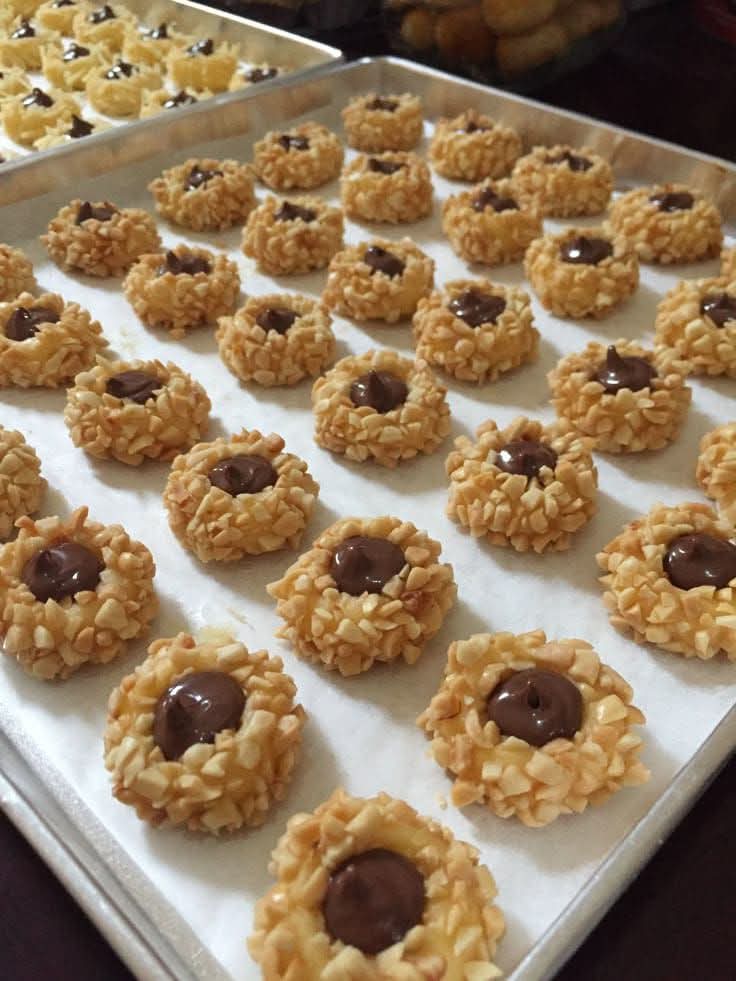
Chocolate Thumbprint Cookies. These classic treats feature a buttery,
tender shortbread-style cookie with a smooth, velvety pool of melted chocolate
right in the center.
Every bite offers the perfect contrast—crumbly richness paired with a luscious,
melt-in-your-mouth chocolate filling. Whether you’re baking for holidays, parties,
or a cozy family dessert night, these cookies never fail to impress.
🍪 Ingredients & Their Roles
- 1 cup (2 sticks) unsalted butter, softened – Creates a tender, melt-in-your-mouth texture
- ½ cup granulated sugar – Adds sweetness and helps the cookies hold their shape
- ¼ cup brown sugar – Adds moisture and a subtle caramel flavor
- 1 large egg yolk – Boosts richness and binds the dough
- 1 teaspoon pure vanilla extract – Enhances flavor depth
- 2 cups all-purpose flour – Provides structure
- ¼ teaspoon salt – Balances sweetness and enhances butter flavor
- 1 cup semi-sweet chocolate chips or chopped chocolate – Forms the silky center
- 2 tablespoons heavy cream – Makes the chocolate filling luxuriously smooth
👩🍳 Step-by-Step Instructions
1. Cream the Butter and Sugars
In a large mixing bowl, beat the softened butter, granulated sugar, and brown sugar
until light and fluffy. This step aerates the dough, creating a soft cookie texture.
2. Add the Egg Yolk and Vanilla
Mix in the egg yolk and vanilla extract until fully incorporated.
3. Combine the Dry Ingredients
In a separate bowl, whisk together the flour and salt. Gradually add to the butter
mixture and mix until a soft dough forms.
4. Shape the Cookies
Roll the dough into 1-inch balls and place them on a parchment-lined baking sheet.
Use your thumb or the back of a spoon to gently press an indentation into the center
of each cookie.
5. Chill the Dough
Refrigerate the shaped cookies for 20–30 minutes. This helps prevent spreading and
keeps the thumbprint shape intact.
6. Bake
Preheat the oven to 350°F (175°C). Bake for 12–14 minutes, or until
the edges are lightly golden. Re-press the centers gently if needed.
7. Make the Chocolate Filling
In a microwave-safe bowl, combine the chocolate and heavy cream. Heat in 20-second
intervals, stirring between each, until smooth and glossy.
8. Fill the Cookies
Spoon the warm chocolate into each indentation. Allow the cookies to cool until the
chocolate sets, or refrigerate for faster setting.
❤️ Why This Recipe Is Loved
- Soft, buttery cookies with a rich chocolate center
- Simple ingredients and beginner-friendly steps
- Elegant appearance with bakery-quality flavor
- Perfect for holidays, gifting, or everyday treats
✨ Pro Tips for Perfect Thumbprint Cookies
- Always chill the dough to maintain shape
- Use high-quality chocolate for the smoothest filling
- Re-press the centers immediately after baking if needed
- Add flaky sea salt, crushed nuts, or sprinkles before the chocolate sets
🍽 Serving Suggestions
- Serve with coffee, hot cocoa, or a cold glass of milk
- Add to holiday cookie trays or dessert boards
- Package in decorative tins for homemade gifts
🍫 Conclusion
These Chocolate Thumbprint Cookies deliver everything you want in a
homemade dessert—simple preparation, stunning presentation, and unforgettable
flavor. With their buttery base and silky chocolate center, they’re guaranteed to
become a favorite on any dessert table.